Starlink Account Verification in Kenya
Starlink Account Verification in Kenya: Stay Connected Without Interruption
Starlink account verification in Kenya is now a mandatory step for all users who want to keep their service active and uninterrupted. As Starlink continues to expand its coverage across the country, compliance with local regulatory requirements has become essential. This means every user must confirm their identity through a simple but crucial verification process linked to their account. Whether you are a new subscriber or an existing user, completing this step ensures your connection remains stable, secure, and fully compliant with national standards.
Failure to complete the verification process can lead to serious consequences, including service suspension or complete disconnection—even if your subscription is fully paid. Many users in Kenya encounter delays due to small but critical errors such as mismatched names, unclear ID uploads, or incorrect details during submission. These issues can trigger repeated verification failures and unnecessary downtime. Understanding the exact requirements and following the correct steps from the beginning is key to avoiding disruptions and ensuring a smooth experience.
This guide is designed to walk you through the entire verification process in a clear and practical way, helping you avoid common pitfalls and complete your verification successfully on the first attempt. From preparing the correct documents to submitting them properly and knowing what to do if verification fails, you will have everything you need to stay connected without stress. By taking a few minutes to complete this process correctly, you protect your service, avoid unnecessary delays, and ensure uninterrupted access to fast and reliable internet across Kenya.
1. What Is Starlink Account Verification?

Starlink account verification is a mandatory process required for all users in Kenya to confirm their identity and maintain an active service. It ensures that every account is linked to a real, verifiable individual or business, helping Starlink comply with regulations while protecting users from fraud and service disruptions.
1.1 A KYC (Know Your Customer) Process Required by Starlink
- Starlink verification follows the global KYC (Know Your Customer) standard used by telecom and financial services.
- Users are required to upload a valid identification (Kenyan ID or passport) through their Starlink account.
- The system checks the authenticity of documents and matches them with account details.
- This ensures every account is linked to a real person or registered entity.
- It reduces risks associated with fake accounts or misuse of the network.
This process ensures accountability and builds trust by confirming that every Starlink user is properly identified.
1.2 Ensures Compliance with Kenyan Regulatory Requirements
- Starlink must comply with Kenyan laws governing telecommunications and digital services.
- Verification ensures all users are properly registered under national regulatory standards.
- Authorities require identification of users to prevent misuse of internet services.
- Unverified accounts may face restrictions, suspension, or permanent disconnection.
- Compliance helps maintain the smooth operations of Starlink services across Kenya.
Completing verification keeps your account legally compliant and prevents unexpected service interruptions.
1.3 Confirms That the Account Holder Matches Official Identification
- The name on your Starlink account must exactly match your official ID.
- Even small differences (spelling errors, nicknames, reversed names) can cause failure.
- The system performs strict checks to avoid identity mismatches.
- Incorrect details may require resubmission or manual review.
- In some cases, a new account may be needed if details cannot be corrected.
Accuracy is critical—matching your ID details perfectly ensures a smooth and successful verification.
1.4 Helps Prevent Fraud and Unauthorised Usage
- Verification blocks unauthorised individuals from using or accessing accounts.
- It prevents fraudulent registrations and illegal use of the network.
- Protects users from account takeovers or identity misuse.
- Enhances overall network security for all Starlink customers.
- Builds a safer and more reliable internet environment.
Verification strengthens security, ensuring that only legitimate users have access and control of Starlink services.
Starlink account verification ensures your account remains secure, compliant, and active, helping you avoid service disruption while protecting your identity and connection.
2. Why Starlink Verification Is Important in Kenya

Starlink account verification is not just a routine step—it is essential for maintaining uninterrupted internet service in Kenya. As regulatory requirements tighten and Starlink enforces compliance measures, verified accounts are prioritised for continued access. Ignoring this process can lead to serious disruptions, even if your subscription is fully paid.
2.1 Mandatory to Keep Your Starlink Service Active
- Verification is now a required step for all Starlink users in Kenya.
- Accounts that remain unverified risk being flagged by the system.
- Starlink may limit access to key features until verification is completed.
- Continued usage of the service depends on successful identity confirmation.
- Even active, paid accounts are not exempt from this requirement.
Verification is essential to keep your Starlink service running without interruptions.
2.2 Required for Compliance with Local Laws
- Starlink must comply with Kenyan telecommunications and digital regulations.
- Authorities require proper identification of all internet service users.
- Verification ensures Starlink operates legally within the country.
- Users must meet these requirements to continue accessing the service.
- Non-compliance can result in enforced restrictions by the provider.
Completing verification ensures both you and Starlink remain compliant with Kenyan laws.
2.3 Prevents Service Suspension or Account Deactivation
- Unverified accounts may face temporary suspension.
- Prolonged failure to verify can lead to full account deactivation.
- Service interruptions can occur without prior detailed notice.
- Re-activation may require additional steps or delays.
- Avoiding verification increases the risk of losing connectivity entirely.
Timely verification protects your account from suspension and unexpected disconnection.
2.4 Protects Your Account from Identity-Related Issues
- Ensures your account is securely linked to your real identity.
- Prevents unauthorised users from accessing or claiming your account.
- Reduces chances of disputes over account ownership.
- Helps resolve support issues faster with verified user details.
- Strengthens overall account security and reliability.
Verification safeguards your account, giving you full control and protection against identity-related risks.
Without verification, your Starlink internet may be restricted or completely disconnected. Completing the process ensures continuous access, legal compliance, and full protection of your account.
3. Step-by-Step Guide: How to Verify Your Starlink Account

Verifying your Starlink account in Kenya is a straightforward process, but it requires attention to detail to avoid delays or rejection. The entire process is done online through your Starlink account dashboard, and following each step correctly ensures a smooth and successful verification.
3.1 Log in to Your Starlink Account
- Visit the official Starlink website using a laptop or desktop browser for best results.
- Enter your registered email address and password.
- Ensure you are logging into the correct account linked to your Starlink service.
- If you have trouble logging in, reset your password before proceeding.
- Once logged in, access your account dashboard, where verification prompts will appear.
Logging in successfully is the first step—always use the correct account details to avoid errors in the verification process.
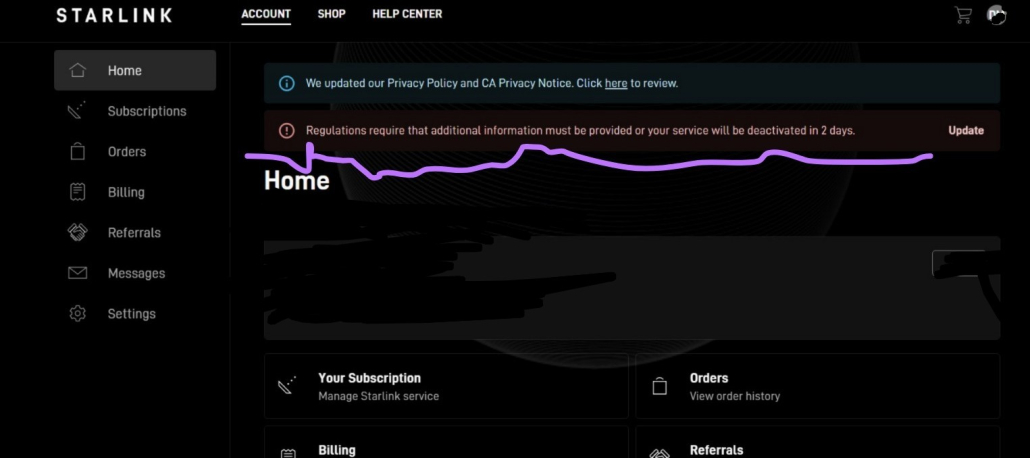
3.2 Click the Red Verification Banner
- A red banner will appear at the top of your dashboard if verification is required.
- This banner is the official prompt indicating your account needs verification.
- Click on the banner to begin the process.
- If you do not see the banner, your account may already be verified or not yet flagged.
- Always use this banner instead of navigating elsewhere to avoid confusion.
The red banner is your direct entry point—clicking it ensures you start the correct verification process.
3.3 Start the Verification Process
- After clicking the banner, follow the on-screen prompts provided.
- Confirm your personal details such as name and account information.
- Ensure all details match your official identification documents exactly.
- Avoid using nicknames or altered spellings.
- Double-check every field before proceeding to the next step.
Accuracy at this stage is critical—correct details prevent rejection and delays.
3.4 Upload Your Identification Documents
- Upload a clear copy of your Kenyan National ID or passport.
- Ensure the image is well-lit, not blurry, and free from glare.
- All details (name, number, photo) must be clearly visible.
- Avoid cropped or partially visible documents.
- Make sure the document matches the account name exactly.
Clear and accurate document uploads significantly increase your chances of instant approval.
3.5 Submit and Wait for Confirmation
- Carefully review all entered details before submitting.
- Click submit to complete the verification process.
- Wait for confirmation—this may be instant or take some time for review.
- Monitor your account or email for updates from Starlink.
- If verification fails, follow prompts or retry with corrected details.
Submitting accurate information ensures faster approval and keeps your Starlink service active.
Following these steps correctly ensures a smooth verification process. Any mistakes—especially in names or document clarity—can delay approval, so take time to review everything before submission.
4. Use a Laptop or Desktop for Best Results

When completing your Starlink account verification in Kenya, the device you use can significantly affect the outcome. While mobile phones are convenient, they often introduce technical limitations that can lead to failed uploads or incomplete submissions. Using a laptop or desktop ensures a smoother, more reliable verification experience from start to finish.
4.1 Mobile Devices May Cause Upload or Submission Issues
- Mobile browsers may not fully support all Starlink verification features.
- Uploading documents from a phone can result in blurry, compressed, or cropped images.
- Some users experience failed submissions due to browser compatibility issues.
- Switching between apps (camera, browser) can interrupt the process.
- Poor network stability on mobile data may also affect uploads.
Mobile devices increase the risk of errors, especially during document upload and submission.
4.2 A Computer Provides a Smoother Verification Process
- Laptops and desktops offer full browser functionality for the Starlink platform.
- Easier to upload high-quality, properly scanned documents.
- Better screen visibility helps in reviewing details accurately.
- More stable internet connection (especially with WiFi or Ethernet).
- Reduces the chances of system glitches or incomplete submissions.
Using a computer ensures a more stable and seamless verification experience.
4.3 Reduces Chances of Failed Attempts
- Fewer technical errors compared to mobile devices.
- Allows proper review of names and details before submission.
- Minimises repeated attempts caused by poor uploads.
- Helps avoid being temporarily locked out after multiple failed tries.
- Increases the likelihood of first-time successful verification.
A laptop or desktop significantly improves your chances of completing verification successfully on the first attempt.
Always use a laptop or desktop for higher success rates. It reduces errors, improves document quality, and ensures a smooth and successful Starlink account verification process.
5. Required Documents for Verification

To complete your Starlink account verification in Kenya, you must provide valid identification documents that meet specific quality and accuracy requirements. Submitting the correct documents in the right format is crucial to avoid delays, rejection, or repeated attempts.
5.1 Accepted Documents
- Kenyan National ID (most commonly used and recommended).
- Passport (ideal for both individuals and business representatives).
- Documents must be valid and not expired.
- The document should clearly show your full legal name and photo.
- Only official government-issued identification is accepted.
Using the correct and valid document ensures your verification process starts on the right track.
5.2 Document Requirements
- Images must be clear, sharp, and high-resolution.
- Ensure proper lighting—avoid dark or overexposed photos.
- No glare, reflections, shadows, or blur on the document.
- All edges and corners must be fully visible (no cropping).
- Text and photo details must be easily readable.
High-quality document images significantly increase the chances of quick and successful verification.
5.3 Exact Name Matching Is Critical
- The name on your document must match your Starlink account exactly.
- Avoid using nicknames, abbreviations, or alternative spellings.
- Ensure the order of names (first, middle, last) is correct.
- Even minor differences (e.g., missing letters or swapped names) can cause rejection.
- Always review and correct your account name before uploading documents.
Perfect name matching is essential—any mismatch can lead to failed verification or delays.
Submitting the right documents with clear images and exact matching details ensures a smooth verification process. Any mistakes in document quality or name accuracy can lead to rejection, so take time to review everything before submission.
6. Do You Need to Visit a Physical Office?

For most users in Kenya, Starlink account verification is designed to be completed entirely online without the need to visit any physical location. The system is built to be convenient, fast, and accessible from anywhere, as long as the verification process is done correctly.
6.1 If Verification Is Successful Online → No Physical Visit Is Required
- Once your documents are successfully verified online, there is no need to visit any dealer or office.
- Approval confirms that your identity has been validated by the system.
- Your Starlink service will continue running normally without further action.
- This applies to both individual and business accounts.
- You can manage everything directly from your Starlink dashboard.
If your verification goes through successfully, your process is complete—no physical visit needed.
6.2 The Entire Process Can Be Completed Online
- All steps—from login to document submission—are done via the Starlink website.
- No paperwork or in-person verification is required in most cases.
- Users can upload documents and track progress from their account.
- The system provides prompts and updates throughout the process.
- Even support requests can be handled through the Starlink message/ticket system.
Starlink verification is fully digital, making it convenient and accessible from anywhere.
6.3 Saves Time and Avoids Unnecessary Costs
- Eliminates the need to travel to a physical location.
- Saves money on transport and service-related expenses.
- Reduces waiting time compared to manual verification processes.
- Avoids additional charges that may arise when engaging third-party dealers.
- Allows you to complete verification quickly at your own convenience.
Online verification saves both time and money while ensuring a faster process.
You do not need to visit a physical office if your verification is successful online. The entire process is designed to be completed digitally—making it faster, easier, and more cost-effective.
7. When In-Person Verification May Be Required

While Starlink verification in Kenya is primarily an online process, there are specific situations where you may be required to seek in-person assistance. This usually happens when the system cannot complete verification automatically or when there are account-related complications that require manual intervention.
7.1 If Verification Fails Multiple Times
- Repeated failed attempts may trigger system restrictions.
- The system may be unable to verify your documents automatically.
- Poor image quality or incorrect details can cause repeated rejection.
- Multiple failures can temporarily block further submissions.
- In such cases, manual verification through a dealer may be required.
If your verification keeps failing, in-person assistance may be necessary to resolve the issue.
7.2 If Your Account Is Locked or Flagged
- Accounts may be locked after too many unsuccessful attempts.
- Suspicious activity or inconsistencies can lead to account flagging.
- You may lose access to verification features temporarily.
- Support may require identity confirmation beyond online submission.
- A dealer can help escalate the issue for manual resolution.
A locked or flagged account often requires additional verification steps that may involve physical assistance.
7.3 If There Are Name Mismatch Issues
- Differences between your account name and ID can cause verification failure.
- Common issues include spelling errors, reversed names, or use of nicknames.
- The system may reject submissions even for small inconsistencies.
- Resolving this may require document review and account correction.
- In some cases, guidance from the original dealer is necessary.
Name mismatches are a major cause of failure and may require in-person support to fix correctly.
What to Carry
- Original Kenyan National ID or passport (not copies).
- Any supporting documents if your case involves name differences (e.g., business registration documents).
- Access to your Starlink account (login details may be required).
- Any previous communication or error messages for reference.
Carrying the correct documents ensures faster resolution during in-person verification.
Important Warning
- Only visit the dealer you purchased your Starlink from.
- Avoid visiting different dealers, as they may charge additional service fees.
- Third-party dealers may not have access to your original purchase details.
- Engaging the wrong dealer can lead to delays or complications.
- Always confirm with your original seller before visiting.
Sticking to your original dealer helps you avoid unnecessary costs and ensures proper support.
In-person verification is only required in special cases such as repeated failures, account issues, or name mismatches. When necessary, always work with your original dealer and carry the right documents to resolve the issue quickly and efficiently.
8. Troubleshooting: What to Do If Verification Fails

If your Starlink account verification fails, don’t panic—most issues can be resolved by following the right steps and escalating properly. The key is to act quickly, provide accurate information, and ensure your case is handled by a real support agent rather than automated responses.
8.1 Use the Messages Tab in Your Account
- Log in to your Starlink account using a laptop or desktop.
- Navigate to the Messages/Support section within your dashboard.
- Check for any system notifications or feedback about why verification failed.
- Review previous communication or automated messages for clues.
- Use this section as your main channel to communicate directly with Starlink.
The Messages tab is your primary support channel—always start here when verification fails.
8.2 Create a Support Ticket
- Open a new support ticket from the Messages/Support section.
- Clearly explain your issue (e.g., name mismatch, document rejection, system error).
- Provide accurate account details (name, email, phone number).
- Attach clear copies of your ID or passport again if needed.
- Include screenshots of any error messages you encountered.
A well-detailed support ticket increases the chances of faster and more accurate resolution.
8.3 Insist on Human Assistance
- Request to be assisted by a real human agent, not automated responses.
- Clearly state that automated replies are not resolving your issue.
- Be firm and specific about what you need (e.g., manual verification, name correction).
- Follow up consistently if you don’t receive a proper response.
- Keep all communication within the same ticket for better tracking.
Persistence is key—insisting on human support ensures your issue is properly reviewed and resolved.
If verification fails, act quickly by creating a support ticket and pushing for human assistance. With clear communication and proper follow-up, most verification issues can be resolved without needing to start over or lose service.
9. Common Starlink Verification Issues

Starlink account verification in Kenya is generally straightforward, but many users encounter common issues that can delay or prevent successful approval. Understanding these problems in advance helps you avoid repeated failures and complete the process smoothly.
9.1 Name Mismatch Errors
- The account name does not match your ID or passport.
- Differences in spelling, order, or missing names cause automatic rejection.
- Use of nicknames instead of official names leads to failure.
- Extra spaces, punctuation, or swapped first/last names can trigger errors.
- Business accounts using personal names (or vice versa) may also fail verification.
Always ensure your Starlink account name matches your official ID exactly—this is the most common cause of failure.
9.2 Failed Uploads
- Uploaded images are blurry, dark, or not clearly readable.
- Documents are cropped, cutting off important details.
- File formats may be unsupported or corrupted.
- Glare or reflections make text and photos unreadable.
- Poor internet connection may interrupt the upload process.
Clear, high-quality document uploads are critical—poor image quality often leads to instant rejection.
9.3 Verification Attempt Limits
- Multiple failed attempts can trigger a temporary account lock.
- The system may block further submissions after repeated errors.
- Users may need to wait before trying again.
- Continuous failed attempts can delay the entire verification process.
- In some cases, support intervention is required to reset attempts.
Avoid repeated guesses—ensure everything is correct before submitting to prevent account lockouts.
9.4 System Errors
- Users may encounter messages like “Verification failed” without a clear explanation.
- Temporary system delays can slow down approval.
- Platform glitches may interrupt submission or processing.
- High demand or maintenance periods can affect performance.
- Errors may require retrying later or contacting support.
Not all failures are user-related—system issues can occur, so retry or escalate if the problem persists.
Most Starlink verification issues are caused by name mismatches, poor document quality, or repeated failed attempts. By understanding these common problems, you can avoid delays and complete your verification successfully on the first try.
10. Practical Tips for Successful Verification

Successfully verifying your Starlink account in Kenya comes down to accuracy, preparation, and using the right tools. Many verification failures can be avoided by following a few practical best practices that significantly improve your chances of first-time approval.
10.1 Use Clear, High-Quality Document Images
- Capture or upload sharp, high-resolution images of your ID or passport.
- Ensure proper lighting—avoid dark, overexposed, or shadowed images.
- Keep the document fully visible (all corners and edges).
- Avoid glare or reflections that may obscure details.
- Use original photos or scans—avoid edited or compressed files.
Clear document images are critical—poor quality uploads are one of the main reasons for rejection.
10.2 Ensure Exact Name Matching
- Your Starlink account name must match your ID exactly.
- Avoid nicknames, abbreviations, or alternative spellings.
- Maintain the correct order of names (first, middle, last).
- Double-check for typos before starting verification.
- Update your account details if necessary before submitting documents.
Exact name matching is essential—small differences can lead to automatic failure.
10.3 Complete Verification Early
- Start the verification process as soon as prompted.
- Avoid waiting until your service is at risk of suspension.
- Early verification gives time to fix any issues if they arise.
- Prevents last-minute pressure or rushed submissions.
- Helps maintain uninterrupted internet access.
Completing verification early reduces risk and ensures continuous service.
10.4 Use a Stable Internet Connection and a Computer
- Use a laptop or desktop for a smoother experience.
- Ensure a stable internet connection during the process.
- Avoid interruptions when uploading documents or submitting details.
- Prevents failed uploads or incomplete submissions.
- Improves overall success rate on the first attempt.
A stable connection and proper device setup greatly improve verification success.
Following these steps increases your chances of approval on your first attempt. By focusing on accuracy, quality, and proper timing, you can complete your Starlink verification smoothly without delays or repeated attempts.
11. Deadlines and Consequences of Not Verifying

Starlink account verification in Kenya is time-sensitive. Once you receive a notification to verify your account, act immediately. Delays or ignoring the verification request can lead to serious consequences, including losing access to your internet service even if your subscription is active and fully paid.
11.1 Starlink Sets Deadlines for Verification
- Starlink provides a specific timeframe within which you must complete verification.
- Notifications usually appear as a red banner on your account dashboard.
- You may also receive alerts via email or within your account messages.
- Deadlines are strictly enforced as part of compliance requirements.
- Waiting too long increases the risk of automatic restrictions on your account.
Always treat verification notices as urgent—deadlines are enforced and should not be ignored.
11.2 Failure to Comply May Result In:
- Service suspension
- Your internet may stop working temporarily until verification is completed.
- Access to online services becomes limited or unavailable.
- Account deactivation
- Prolonged failure to verify may lead to full account shutdown.
- Reactivating the account may require additional steps or support intervention.
- Loss of connectivity
- Complete disconnection from the Starlink network.
- Business and personal operations may be significantly disrupted.
Failure to verify can lead to complete service loss, affecting both personal and business connectivity.
👉 Always verify immediately after notification. Acting early ensures uninterrupted service, avoids unnecessary stress, and keeps your Starlink account fully active and compliant.
12. Starlink Verification for Businesses and Companies

Starlink verification for businesses in Kenya follows a slightly more detailed process compared to individual users. Since the account represents a legal entity, additional documentation and strict accuracy are required. Ensuring that all company details are correctly submitted helps avoid delays and ensures uninterrupted service for business operations.
12.1 Additional Requirements
- Company registration documents (e.g., Certificate of Incorporation or Business Registration Certificate).
- Director’s or authorised representative’s ID (Kenyan ID or passport).
- The person verifying must be legally linked to the company.
- Documents must clearly show the official company name.
- All submitted details must align with the account information.
Business verification requires both company and personal identification—ensure all documents are valid and properly linked.
12.2 Common Challenges
- Using a personal name instead of the registered company name on the account.
- Mismatch between company documents and account details.
- Submitting documents that do not clearly show ownership or authorization.
- Confusion between individual and business account setup.
- Minor inconsistencies in names leading to rejection.
Most business verification failures are caused by mismatched details—accuracy is critical.
12.3 Best Practice
- Always register and verify using the official company name as it appears on registration documents.
- Ensure all documents (company and personal) match the account details exactly.
- Double-check spelling, formatting, and name order before submission.
- Assign verification to a director or authorised representative.
- Prepare all documents in advance to avoid delays.
Following best practices ensures a smooth verification process and prevents unnecessary rejections.
For businesses, Starlink verification requires extra attention to detail. Using the correct company information and matching documents ensures successful verification and uninterrupted connectivity for your operations.
13. FAQs on Starlink Account Verification in Kenya
Starlink account verification in Kenya raises many questions, especially for users who are completing the process for the first time. Below are detailed answers to the most common questions to help you understand what is required, what to avoid, and what to do if verification fails.
13.1 Is Starlink Verification Mandatory?
- Yes, Starlink verification is mandatory for users who receive a verification request.
- It is required to confirm the identity of the account holder.
- The process helps Starlink comply with Kenyan regulatory requirements.
- If your account is selected for verification, you should complete it immediately.
- Ignoring the request may put your service at risk.
Starlink verification is required if prompted, and completing it helps keep your service active and compliant.
13.2 What Happens If I Don’t Verify?
- Your Starlink service may be restricted.
- Your account may be suspended until verification is completed.
- In some cases, continued failure to verify may lead to account deactivation.
- You may lose internet access even if your monthly subscription is paid.
- Restoring service may take longer if the issue is not handled early.
Failure to verify can lead to service interruption, so it is best to complete the process as soon as possible.
13.3 Can I Verify Using My Phone?
- Yes, you may be able to complete verification using a mobile phone.
- However, mobile browsers can sometimes cause upload or submission issues.
- Photos taken on mobile may be blurry, cropped, or affected by glare.
- A laptop or desktop gives you better visibility and smoother navigation.
- Using a computer reduces the chances of failed attempts.
A phone may work, but a laptop or desktop is strongly recommended for a smoother and more successful process.
13.4 What Documents Are Required?
- The most common documents are a Kenyan National ID or a passport.
- The document must be valid and clearly readable.
- It should show your full legal name and identifying details.
- All edges of the document should be visible in the uploaded image.
- The details must match your Starlink account information exactly.
Use a clear Kenyan ID or passport that matches your account details to avoid rejection.
13.5 Why Is My Verification Failing?
- The most common reason is a name mismatch between your account and ID.
- Poor-quality images can also cause rejection.
- Blurry, dark, cropped, or reflective photos may not be accepted.
- An incorrect document type or unsupported file format may cause upload failure.
- System errors or temporary delays may also affect the process.
Verification usually fails because of mismatched names or unclear documents, so review everything carefully before resubmitting.
13.6 Do I Need to Visit a Physical Office?
- No, you do not need to visit a physical office if verification is successful online.
- The process is designed to be completed through your Starlink account.
- You only need to upload the required documents and submit them online.
- A physical visit may only be necessary if verification repeatedly fails.
- Always avoid unnecessary visits unless you are advised to seek further help.
Most users can complete verification fully online without visiting any office or dealer.
13.7 What Should I Do If Verification Keeps Failing?
- Log in to your Starlink account.
- Go to the Messages or Support section.
- Create a support ticket explaining the issue clearly.
- Attach your ID/passport and screenshots of the error message.
- Request assistance from a real human agent instead of automated replies.
- Follow up consistently until the issue is resolved.
If verification keeps failing, escalate through the support ticket system and request human assistance for manual review.
13.8 Can Someone Else Verify for Me?
- Verification should be completed by the actual account holder.
- The ID or passport submitted must match the account details.
- If another person’s document is used, the verification may fail.
- For business accounts, a director or authorised representative may be required.
- The person verifying must have documents that align with the account setup.
Someone else can only assist if their details are legally connected to the account and match the required verification information.
13.9 How Long Does Verification Take?
- Verification is usually quick if all details are correct.
- Some accounts may be approved almost immediately.
- Delays may occur if documents require manual review.
- Name mismatches or poor image quality can slow down the process.
- Support response times may vary depending on case complexity.
Verification can be fast, but errors or manual review may cause delays—submit accurate details to speed up approval.
13.10 What If I Exceed Attempts?
- Too many failed attempts may temporarily lock or limit your account.
- You may need to wait before trying again.
- Avoid repeated submissions without correcting the issue.
- Review your details and document quality carefully before the next attempt.
- If the issue continues, contact Starlink support through the Messages tab.
If you exceed attempts, pause, correct the problem, and contact support instead of repeatedly submitting the same details.
13.11 Can I Change My Account Name?
- Starlink account name changes are usually limited.
- Corrections may only be allowed in specific cases, such as legal name changes.
- If the account name is completely different from your ID, verification may fail.
- In some cases, you may be advised to create a new account with the correct legal name.
- Always use your official name from the beginning to avoid this issue.
Account name changes are not always possible, so your Starlink account should be created using your correct legal name.
13.12 Who Should I Contact for Help?
- First, use the Messages/Support section inside your Starlink account.
- Create a ticket and explain the issue clearly.
- If you bought the kit from a dealer, contact the same dealer you purchased from.
- Avoid engaging a different dealer, as this may attract extra service charges.
- Your original dealer is better placed to assist because they understand your purchase history.
For help, contact Starlink support through your account or reach out to the original dealer who sold you the kit.
Starlink account verification in Kenya is important for keeping your service active, secure, and compliant. Most problems can be avoided by using clear documents, matching your account name exactly with your ID, completing the process early, and contacting support immediately if verification fails.
Stay Connected Without Interruptions

Starlink account verification in Kenya is a straightforward yet critical step in ensuring your service remains active, secure, and fully compliant with local requirements. By carefully following the correct process—logging in through the official platform, submitting clear identification documents, and ensuring all details match your legal records—you can complete verification without delays or complications.
Acting early is key to avoiding unnecessary service disruptions. Delaying verification, even when your subscription is fully paid, can lead to suspension or disconnection, which can interrupt both personal and business operations. It is always advisable to complete the process as soon as you see the verification prompt, double-check your details before submission, and follow up immediately if any errors arise. If challenges persist, raising a support ticket and requesting human assistance ensures your case is handled properly and without repeated automated responses.
Equally important is knowing where to seek help. Always work with the original dealer or reseller from whom you purchased your Starlink kit, as engaging a different dealer may lead to additional service charges and unnecessary complications. To stay connected without interruptions, make sure you complete and manage your verification through Starlink Kenyawhere you can access guidance, support, and the correct process for a smooth verification experience.